A user should create separate grading periods so grades can be divided by date range without the need for additional course builds.
Enable grading periods in your course
Grading periods can be set up in two ways:
- System admins can set up domain-level grading periods that are associated with a specific school year. When you create a new course in that domain, it will automatically use these settings.
- You can set up course-level grading periods using the directions below.
- Within the Course Syllabus, select the Editor tool from the Header Menu.
- Select Course settings from Tools in the toolbar.

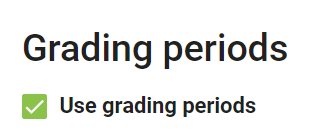
- In the Grading Periods card, check the Use Grading Periods box.
From here, you can:
-
- Give each grading period a name; it may be useful to include date ranges.
- Assign each grading period a grading weight. This number determines the relative impact each period has on the overall grade; if each period should have equal impact, assign the same number to each.
- Add grading periods.
- Remove grading periods by selecting the garbage can (delete) icon next to each.
- Inherit activity grading period from top-most folder.
- Use the up and down arrows to manage the period order.
- Select Save.

Assign activities to grading periods
Once you've enabled grading periods, use the activity editors to assign activities to them.
- Within the Syllabus, expand the folders and locate the desired activity.
- Select Edit (pencil) icon.
- In the Settings tab, locate the Gradebook and submission card. Check the box next to This activity is gradable and then select the desired period from the Period dropdown menu.
- Select Save.

Additional Articles
Tips
- Only gradable Activities can be assigned to grading periods.